IV – Setup Jenkins With Add-Ons Plugins and Some Hands-On
April 25, 2022
In this blog, my effort is to direct you through the Jenkins installation process. So let us move straight into the process. Just begin according to the following steps for Jenkins installation in combination with the suggested plugins.
The process can be epitomized in the five below steps:
- Java Version 8 installation – Jenkins belongs to a Java based application. So Java is compulsory
- Download Jenkins File – This is required for Jenkins installation
- Jenkins installation – Deploy Jenkins file on a web server for running Jenkins
- Firewall adjustment – Open 8080 (default port) for running Jenkins
- Suggested Plugins setup and installation – Install Jenkins and the list of plugins that are suggested by Jenkins
Installing Java
Jenkins is a Java application. Hence it needs Java 8 or can be installed later on the system. At this moment we shall install OpenJDK 11. It is an open-source implementation of the Java platform. You need to run the following commands as the root or user with sudo privileges or root to install OpenJDK
$ sudo apt update
$ sudo apt install openjdk-11-jdk
Soon the Java development kit gets installed, do verify the kit by checking the JDK version by the following command:
$ java – version
Jenkins Download and Installation
Now we will activate the Jenkins APT repository, download, and then install the Jenkins Package.
Further, import the GPG keys of Jenkins Repository by using wget command.
$ wget -q -O – https://pkg.jenkins.io/debian/jenkins.io.key | sudo apt – key add –
Thereafter, add the Jenkins Repository to the system repository with
$ sudo sh -c 'echo deb http://pkg.jenkins.io/debian-stable binary/ > /etc/apt/sources.list.d/jenkins.list'
The moment the repository is activated, update the apt package list and install the latest version of Jenkins with the following command.
$ sudo apt update
$ sudo apt install jenkins
Later, verify the Jenkins service status by using the following command:
$ systemctl status jenkins
Firewall Adjustment
In case if you are installing Jenkins on a remote Ubuntu server that has firewall security, you need to open the port 8080.
If you look forward to allowing Jenkins to have access from a specific IP range, for example allowing connections only from the 10.10.10.0/24 subnet, use the following command
$ sudo ufw allow proto tcp from 192.168.121.0/24 to any port 8080
If you are looking to allow Jenkins from anywhere then run the command
$ sudo ufw allow 8080
Jenkins Setup and Add-on Plugins
For setting up the Jenkins, you must open the browser with your domain or an IP address that is followed by port
8080
like
http://your_ip_or_domain:8080
The page will be displayed as below. It will prompt you to enter the Administrator password that is created at the time of the setup process.
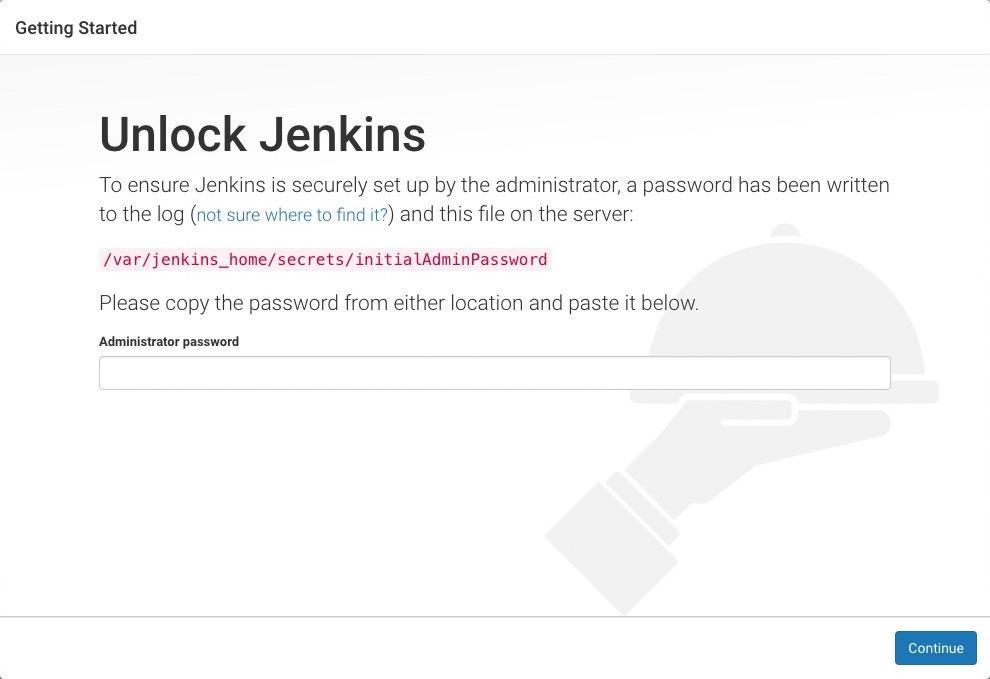
During the setup process created a password, which you can get by using
$ sudo cat /var/lib/jenkins/secrets/initialAdminPassword
Now you will get a 32 char long alphanumeric password like
Output
06cbf25d811a424bb236c76fd6e04c47
Later, a setup wizard will appear that will ask you about the installation of the suggested plugins or else if you wish to select any specific plugins.
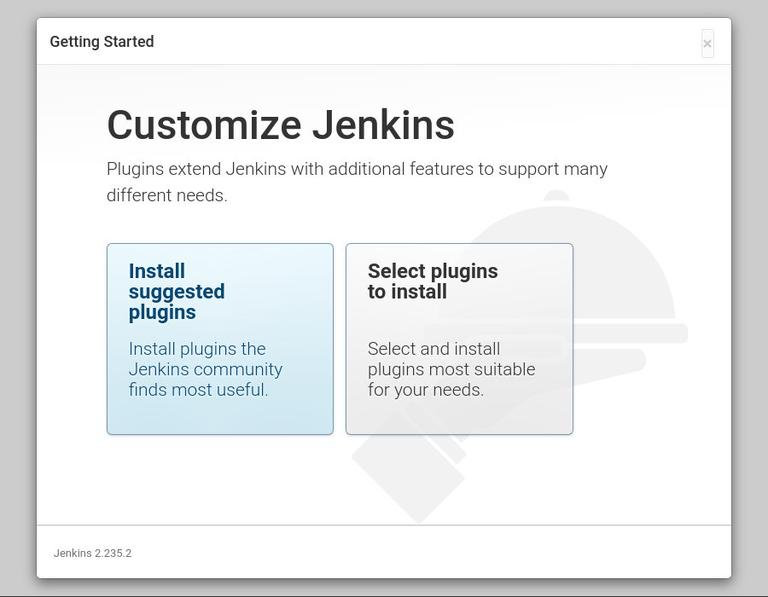
Chose to “Install suggested plugins” and the installation process will start

Soon after the setup process gets completed, Jenkins will begin. It will get redirected to the Jenkins Dashboard that is logged in as a Admin User created in the previous steps.

Let us head over to the installation of the most used Plugins on Jenkins Jenkins generally gives you two methods to install the plugins on the controller:
- Using the “Plugin Manager” in the web UI.
- Using the Jenkins CLI install-plugin command.
If you use Web to install plugins then it is through the Manage Jenkins>Manage Plugins. Below the Available tab, there are listed all the available plugins. Else, you can search by Filter options given over the right hand side.
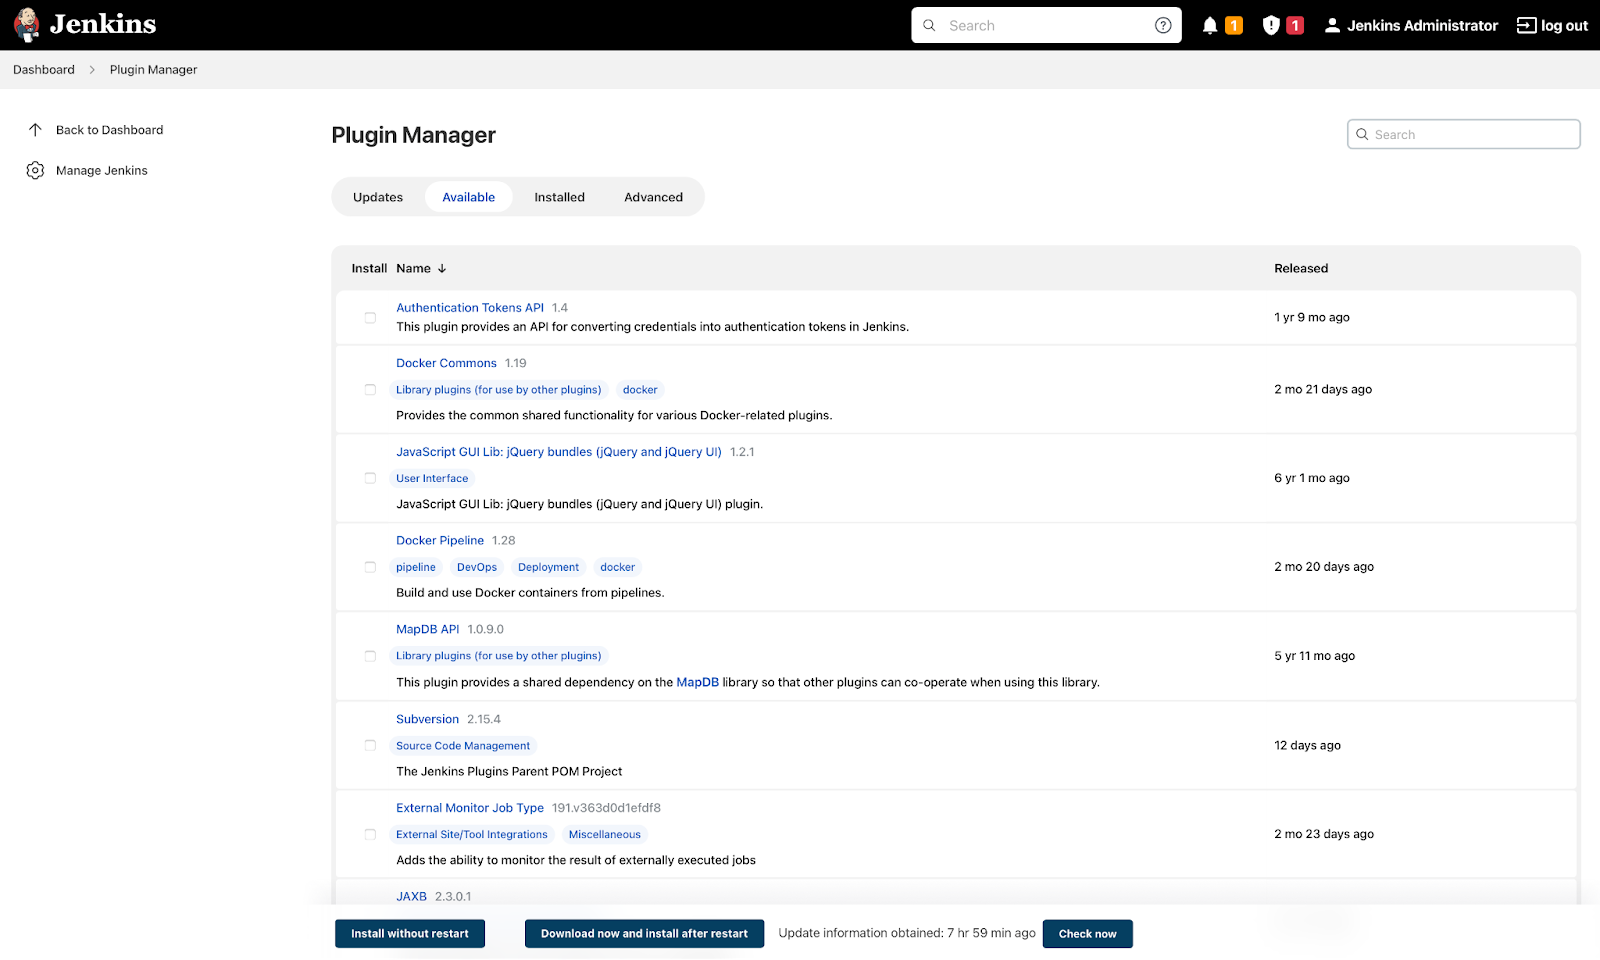
Choose the Plugins such as Maven, Git, AWSEB Deployment Plugin, .NET SDK Support, and several similar ones. Thereafter, click on the “Install without restart” tab to get the installation of the selected plugin done.
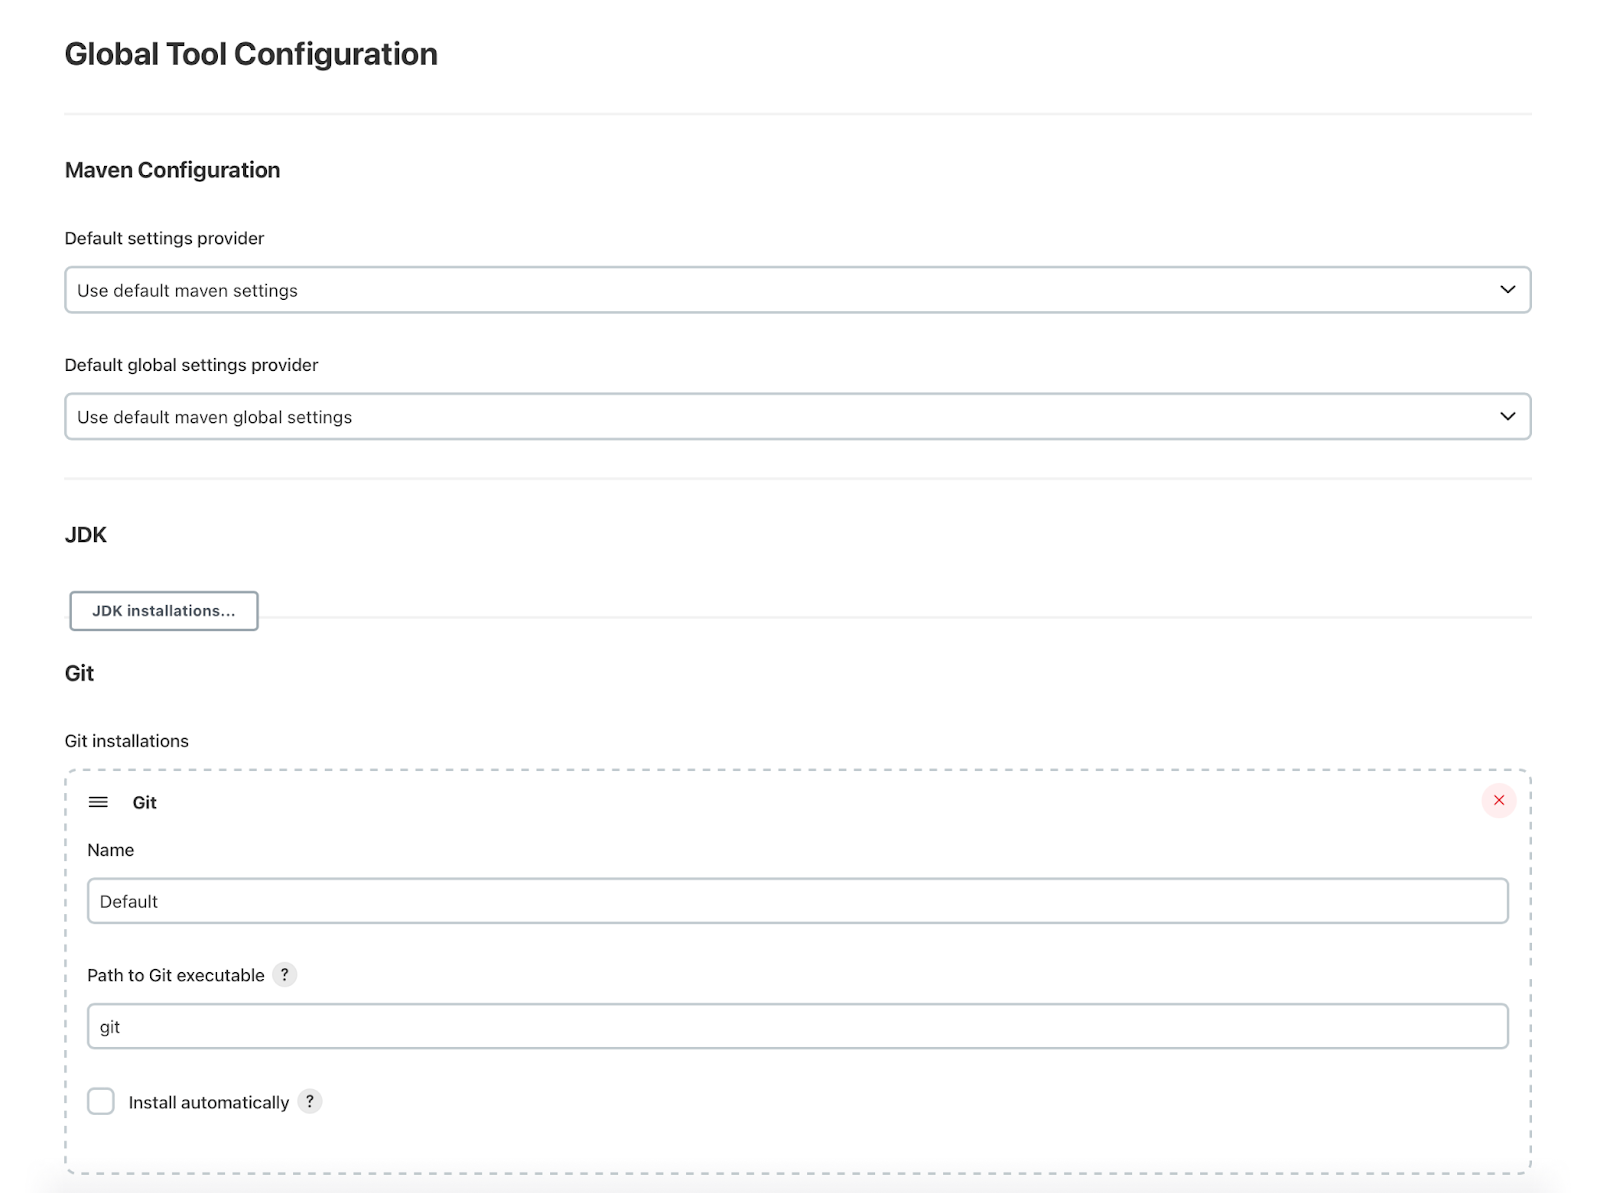
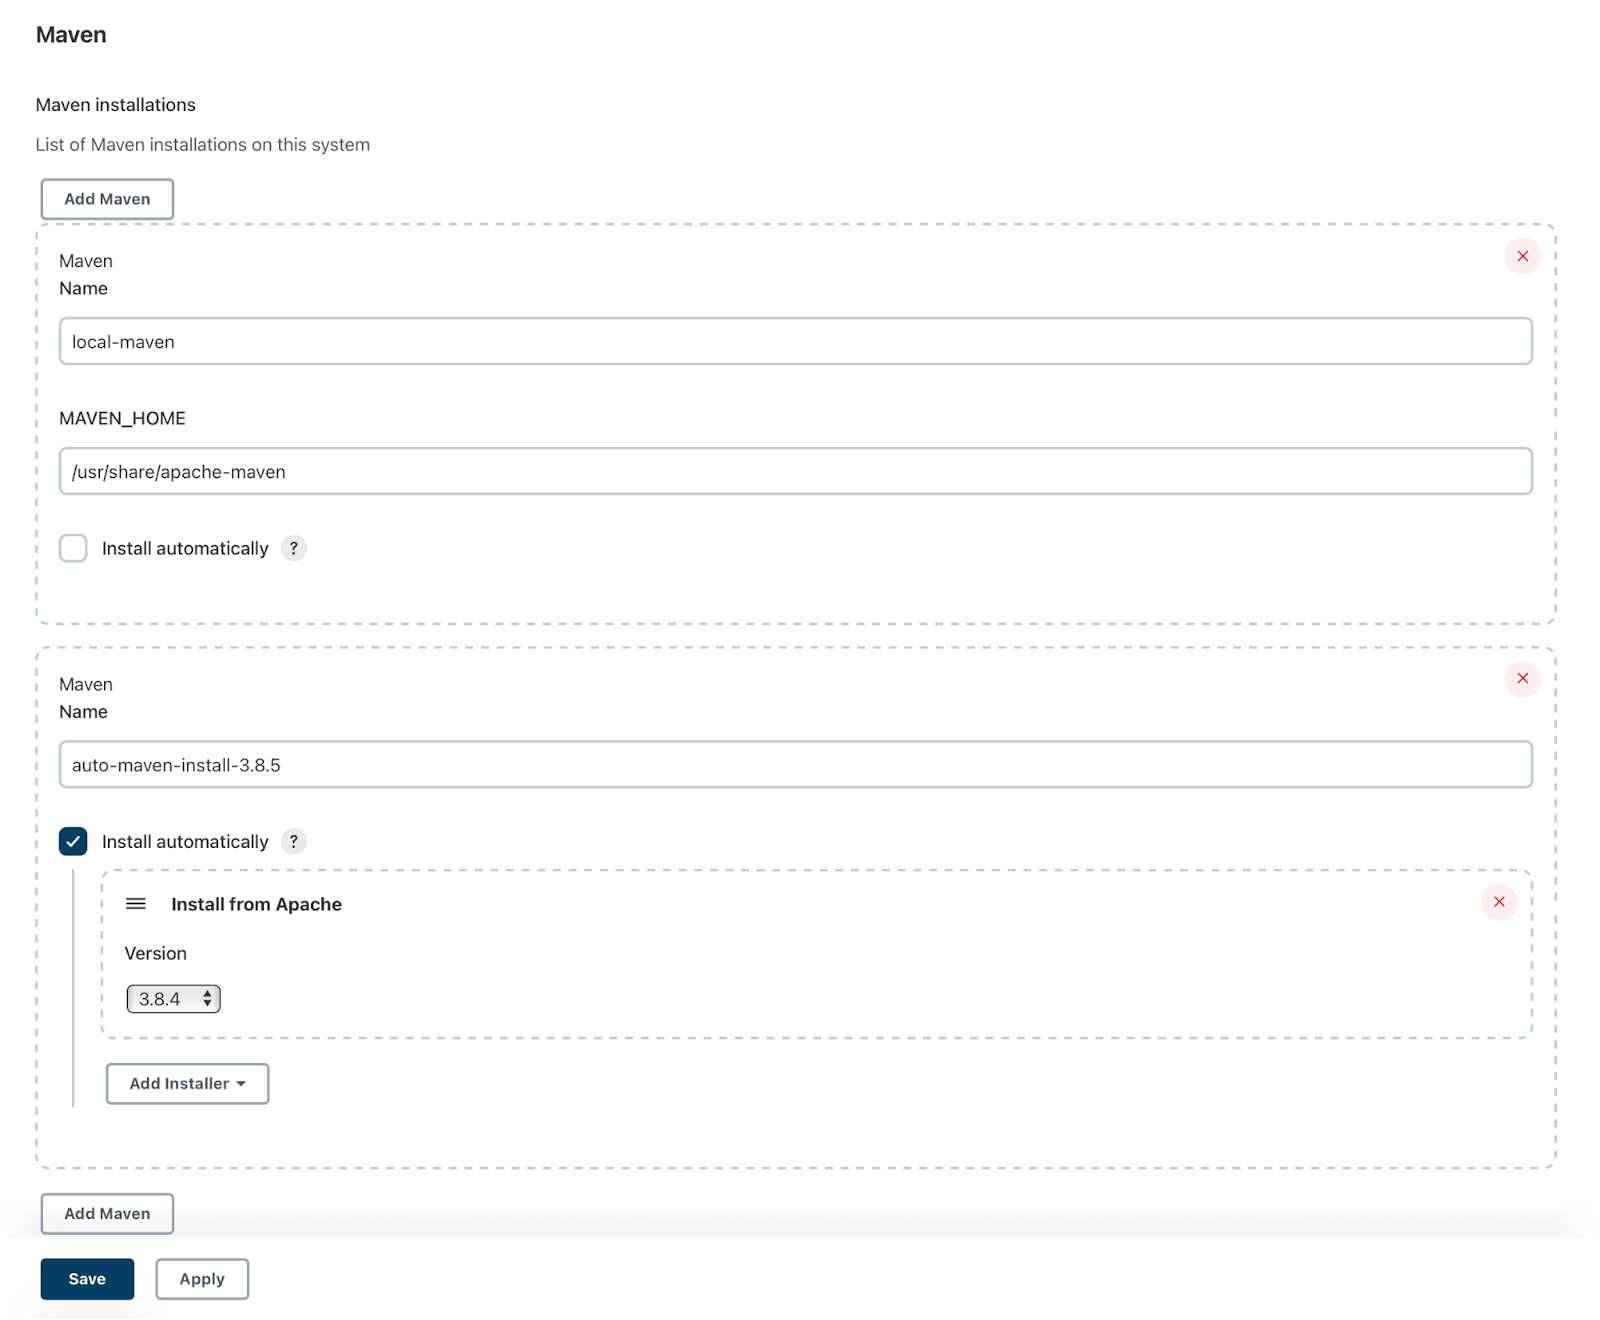
Let us now configure the installed plugins for future jobs by using Manage Jenkins > Global Tool Configuration option.
Develop Your First Ever Jenkins Build Job
The Jenkins freestyle job is the core fundamental of Jenkins CI for starters.
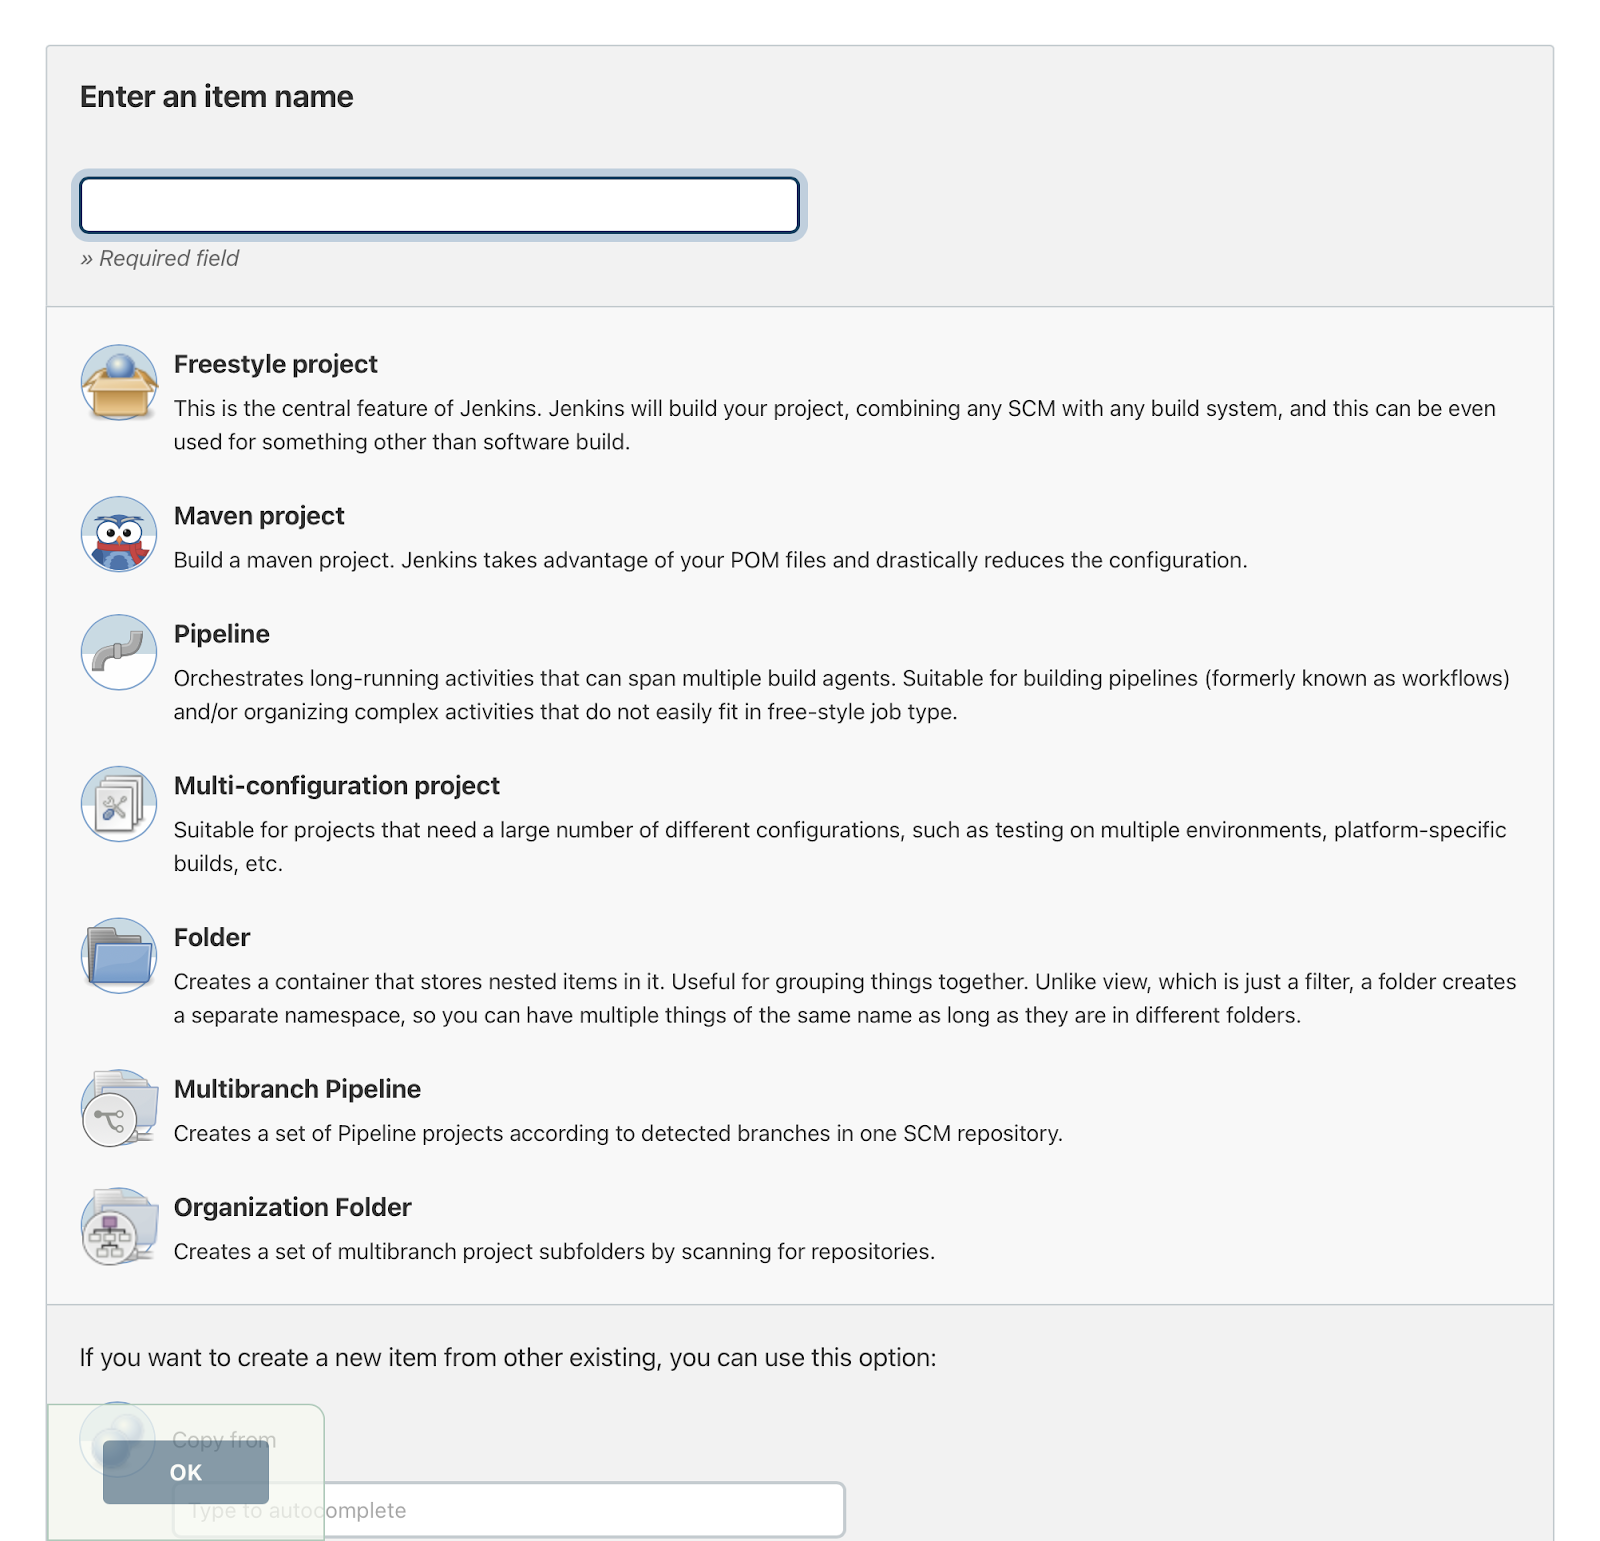
Jobs in Jenkins basically handle the build of the project. So go ahead and select New Item. Thereafter enter the name of the job and choose the Jobstyle project. Press the OK button.
On Next Screen, General Tab enters Description about the Jenkins Job.

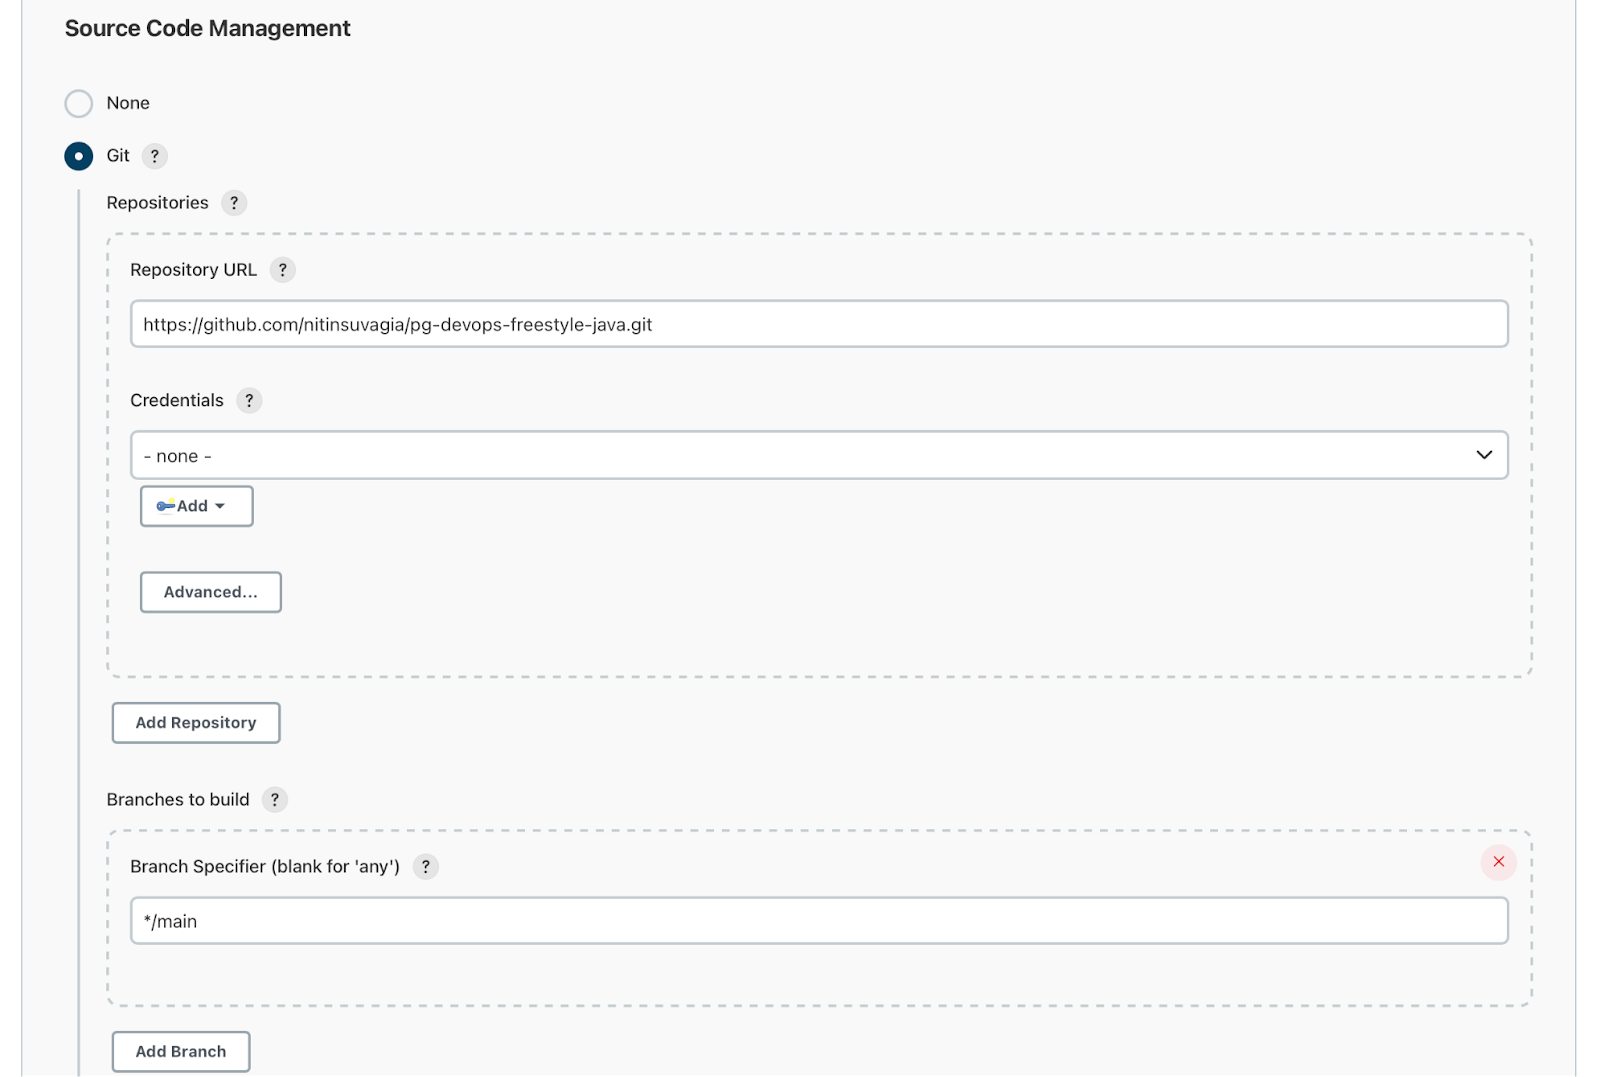
The second Tab will take you down to the Source Code Management. Now choose Git there and mention your GIT repository URL and the branch name to create and build the code.
Further now is Build Trigger moving on to auto triggered for building the Jobs after the commits occurred to the mentioned branch as above.
This field schedule follows the syntax of cron (with minor differences). Specifically, each line consists of 5 fields separated by TAB or whitespace:
- MINUTE
- HOUR
- DOM
- MONTH
- DOW
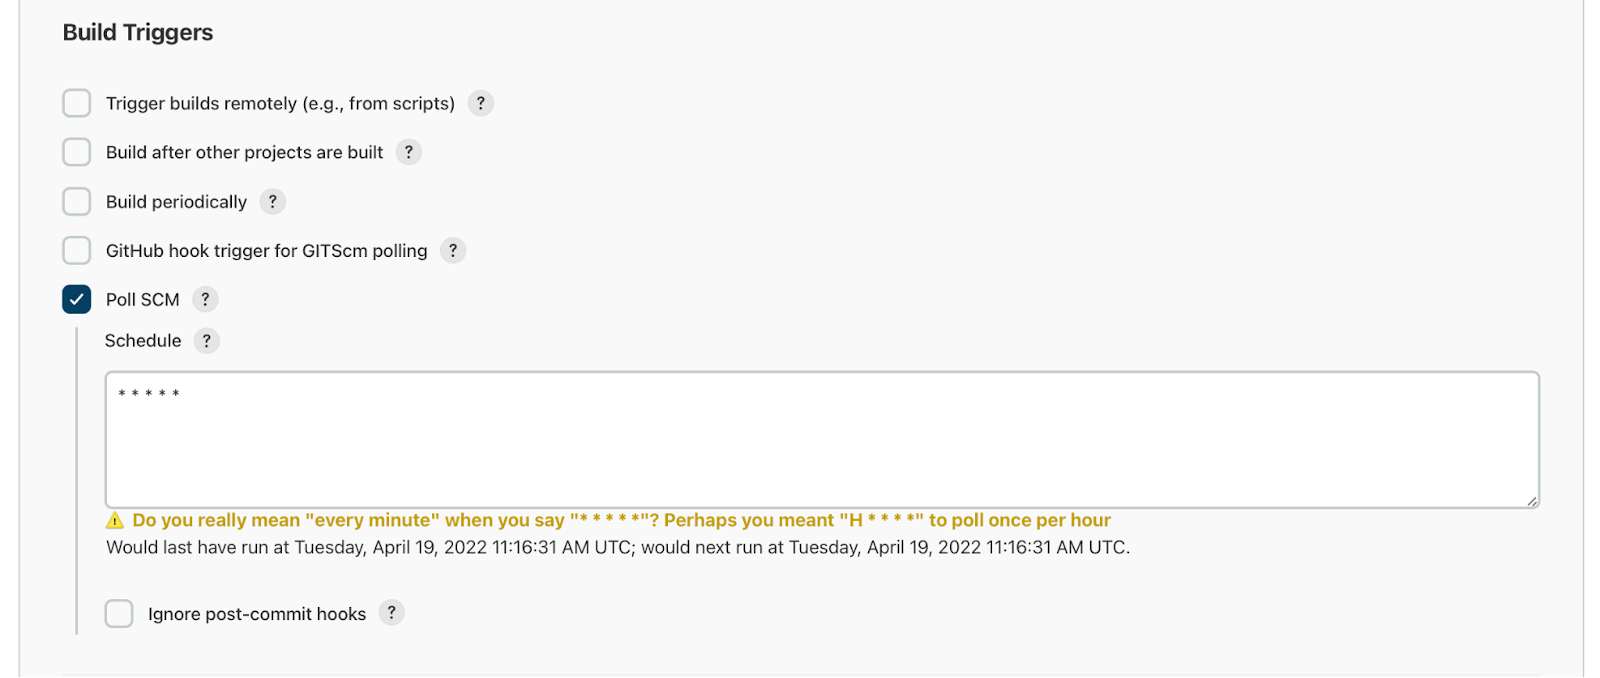
Examples:
# Every fifteen minutes (perhaps at :07, :22, :37, :52):
H/15 * * * *
# Every ten minutes in the first half of every hour (three times, perhaps at :04, :14, :24):
H(0-29)/10 * * * *
# Once every two hours at 45 minutes past the hour starting at 9:45 AM and finishing at 3:45 PM every weekday:
45 9-16/2 * * 1-5
# Once in every two hour slot between 8 AM and 4 PM every weekday (perhaps at 9:38 AM, 11:38 AM, 1:38 PM, 3:38 PM):
H H(8-15)/2 * * 1-5
# Once a day on the 1st and 15th of every month except December:
H H 1,15 1-11 *
And the last part – The Build Section. Here select the Execute Shell from the many build steps that are concerned to the project.
At this stage, and at this place we shall use Execute Shell to run Javac and Java command for building and executing Java project of Git repository. Thereafter Save the job for building it further.

Now to reach to the Job Detail page for building the Job, use the left panel “Build Now” option.
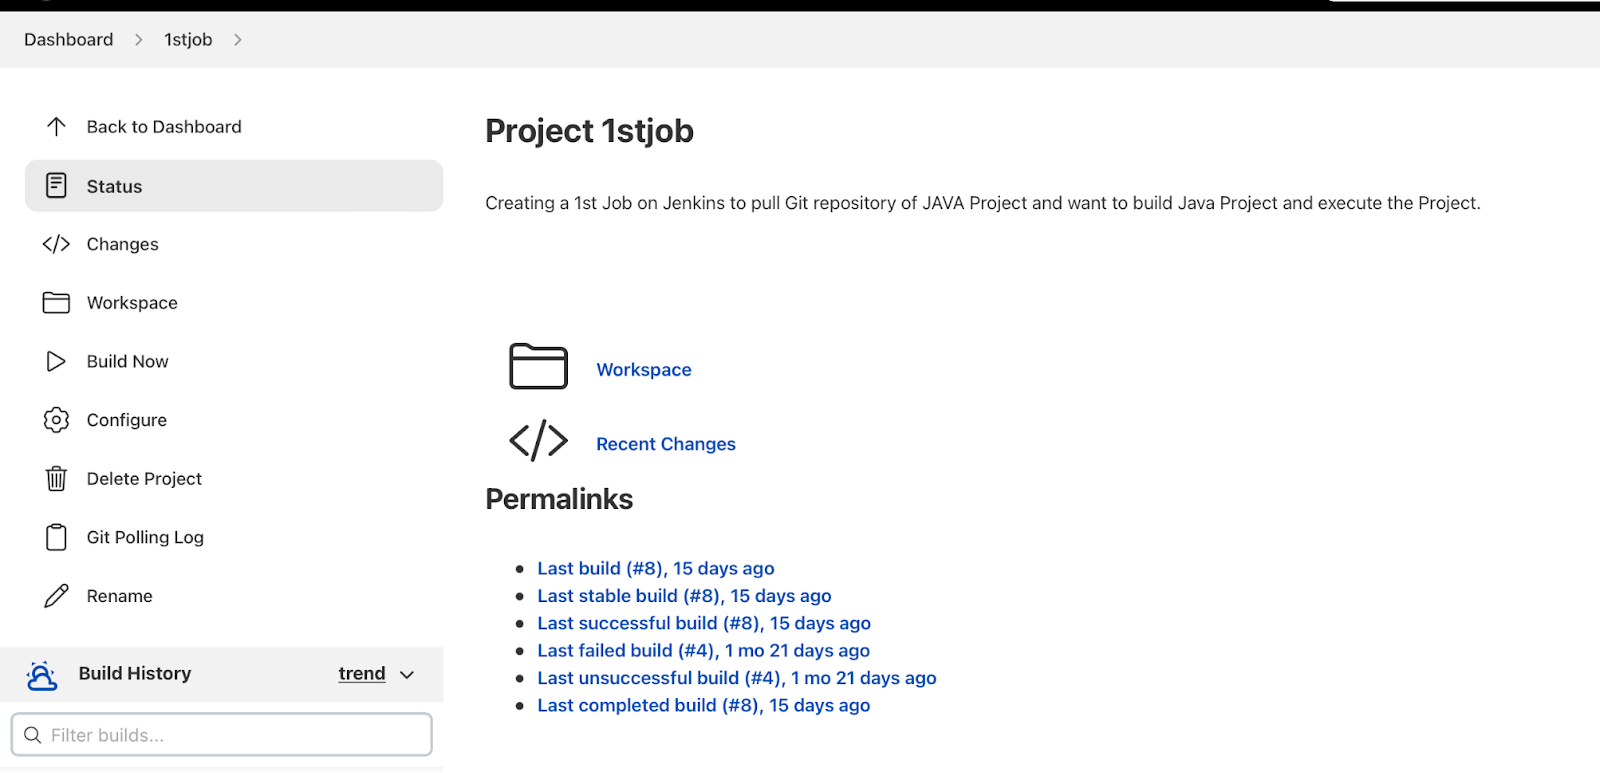
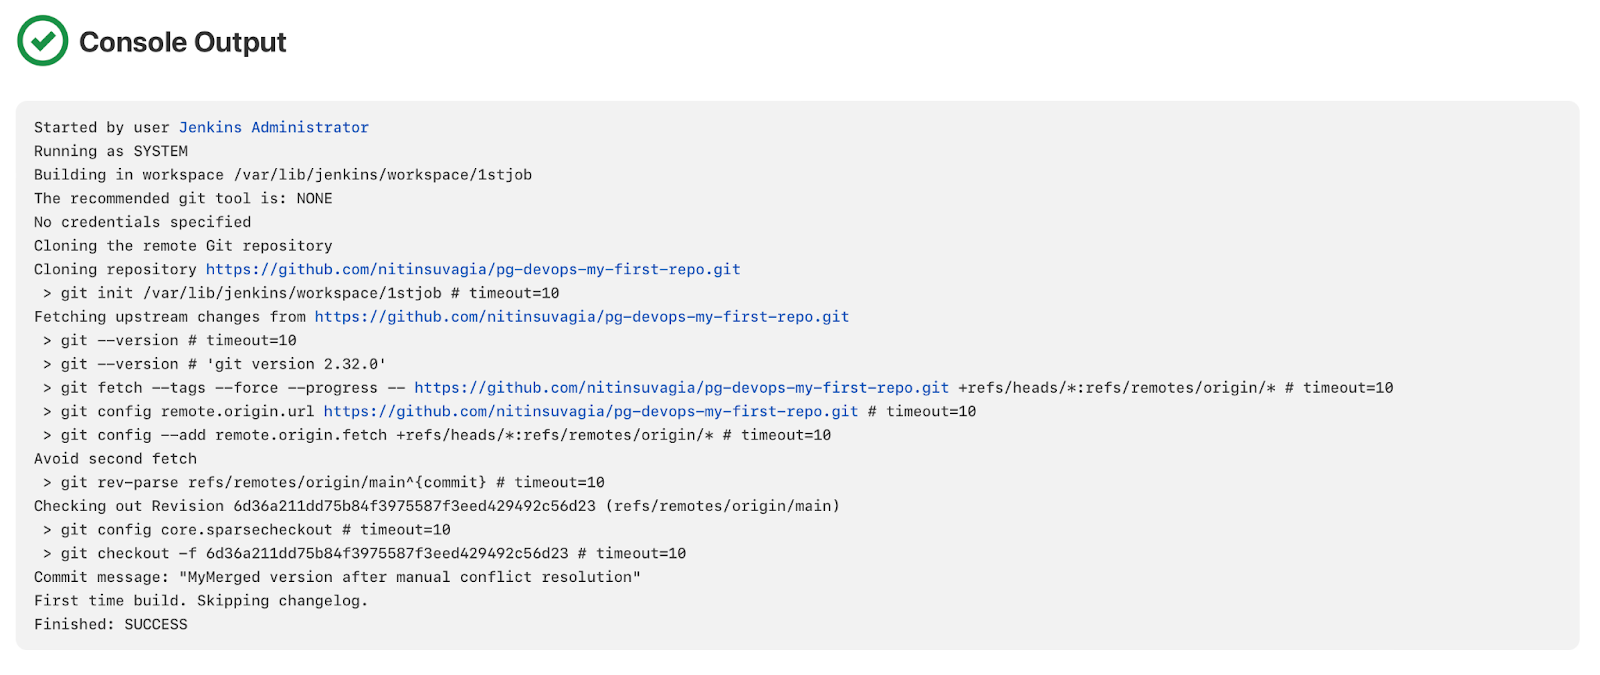
In the build page, you will find the Console Output that talks about all the steps of Jenkins Job.
Conclusion
I am sure you are now confident enough after having this detailed Jenkins Installation guide. So go ahead and set up it. Install the Jenkins Plugins also. For all the DevOps engineers, it will be now easy to configure Jenkins. You can manage plugins and then set up global configurations for all those plugins. I also hope that these practical examples and hands-on functionalities will help you out in configuring SCN, then trigger build on the particular time span, and know the ways to build the job by using the shell script. Good luck for now!


